Apache SpamAssassin is an email utility that uses Bayesian spam filtering and network tests tp examine incoming email and test for spam characteristics. SpamAssassin ranks emails with an overall score to determine whether it should discard a message.
ServInt Cloud VPS accounts using the cPanel/WHM control panel come with SpamAssassin as part of the standard installation. The default configuration has SpamAssassin enabled.
If you need to re-enable SpamAssassin:
- Log into WHM.
- Under Server Configuration on the top of the left-hand navigation bar, click on Tweak Settings.
- Click the Mail tab.
- Select On for Enable SpamAssassin spam filter.
Note: ServInt recommends leaving “Enable BoxTrapper spam trap” set to Off.
To force all the users on your VPS to use SpamAssassin:
- Log into WHM.
- Scroll down the left-hand navigation bar to Service Configuration and click on Exim Configuration Manager.
- Select the Apache SpamAssassin Options tab.
- Set Apache Spam Assassin: Forced Global ON to On.
This will filter all of your email for spam. It will not, however, force your users to do anything with it after it’s filtered. It will simply mark spam as spam, nothing more.
To prevent spam from being sent from your server:
If you host email for your clients and want to prevent RBLs (Realtime Blackhole Lists) from blacklisting your server due to inadvertent (or intentional!) spam your customers might be sending, you can configure SpamAssassin to run on outgoing messages as well.
- Log into WHM.
- Scroll down the left-hand navigation bar to Service Configuration and click on Exim Configuration Manager.
- Select the Apache SpamAssassin Options tab.
- Select one of the two options:
- Scan outgoing non-local messages for spam and reject based on the Apache SpamAssassin internal spam_score setting. (Grades outgoing emails based on a score of 5.)
- Scan outgoing messages for spam and reject based on defined Apache SpamAssassin score. (Grades outgoing emails based on a specified score.)
The first option will grade your email based on your system’s incoming spam-scoring settings, wherever they are set. If you want to get your SpamAssassin score below a certain number value you have predefined, use the second option.
Note: Apache SpamAssassin will not scan messages that are being forwarded to remote email addresses.
Configuring your internal SpamAssassin score threshold:
If you see too much spam getting through your filters, you can lock them down further by adjusting your internal SpamAssassin score.
- Log into WHM.
- Scroll down the left-hand navigation bar to Service Configuration and click on Exim Configuration Manager.
- Select the Filters tab.
- Specify a score under Apache SpamAssassin bounce spam score threshold. Lower numbers will make your filters label more email as Spam.
Note: It is important to understand that making any of these changes will affect all email accounts on the entire server. You should, therefore, make sure all your clients are aware of the settings you are changing.
Configuring Apache SpamAssassin in cPanel:
- Log into cPanel.
- Under Mail, click on Apache SpamAssassin.
- On the next page, enable Apache SpamAssassin if disabled.
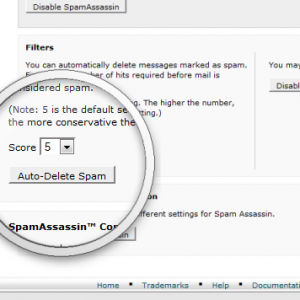
- Configure auto-deletion of Spam.
- This feature automatically deletes any incoming email that meets or exceeds the score limit. Use caution.
- On the same page, specify the desired score (or leave at the default setting of 5) and click on the “Auto-Delete Spam” button.
- To disable this feature, click on the “Disable Auto-Delete Spam” button.
- Additional Configuration.
- On the same page, click the “Configure Apache SpamAssassin” button
- BlackListing allows you to block Spam from email addresses that bypassed your SpamAssassin filter. To blacklist, enter the corresponding value in the “blacklist_from” text fields. Valid values are:
- [email protected] (a specific email address)
- *@domain.com (all email from a single domain)
- *.domain.com (all email from any subdomains off a single domain)
- WhiteListing allows you to bypass the SpamAssassin filter for important emails/domains that you never want blocked. To whitelist, enter the corresponding value in the “whitelist_from” text fields. Valid values are the same as those for BlackListing.
- Additional blacklist/whitelist fields are automatically added after adding/saving 5 values.
Originally posted on October 1, 2016 @ 12:44 pm
